Supporting materials
Download
Download this article as a PDF


Great and small: use this photomicroscopy project to explore the way structure relates to function and the links between science and art.
The development and first uses of microscopy date back hundreds of years.
The ability to view things normally not seen with the naked eye opened the door to numerous discoveries and new scientific fields, such as microbiology, histology, and cell biology. Microscopy is now an indispensable tool for modern life sciences and, over the years, has branched out into several fields, including optical, electron, scanning probe, and X-ray microscopy.
Despite all the beautiful images that can be taken using microscopes, the arts and sciences are often seen as completely independent disciplines. Upon closer inspection, however, the influence of one on the other becomes clear. While creativity is involved in scientific experiments, art is also often inspired by science. In the end, both disciplines try to describe life and the world around us. The connection between science and art allows for an interdisciplinary approach to teach students to delve into creative and innovative thinking.
The following activities allow students to familiarise themselves with a light microscope, view the overlap between science and art through a visual approach, consider structure–function relationships, and recognise science in their daily lives.
The activities are ideal for groups of two to three students. The suggested age range is 11 and older. Younger students can focus on getting the images and making comparisons, and older students can do some research to learn more about the science behind the function of whatever they have imaged.
In this activity, students choose the specimen they would like to observe under the microscope and, depending on time, they can prepare one or more microscope slides. Through this, students learn the basic techniques of microscope slide preparation. This activity takes around 1.5 h.
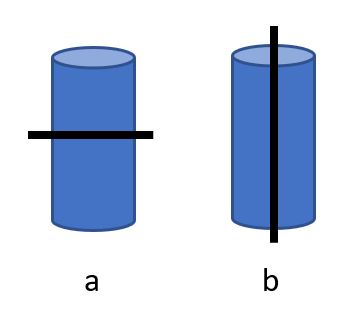
Depending on the sample to be imaged, different microscope types and/or setups need to be used. Transmission microscopy illuminates the sample from below and reflectance microscopy from above.
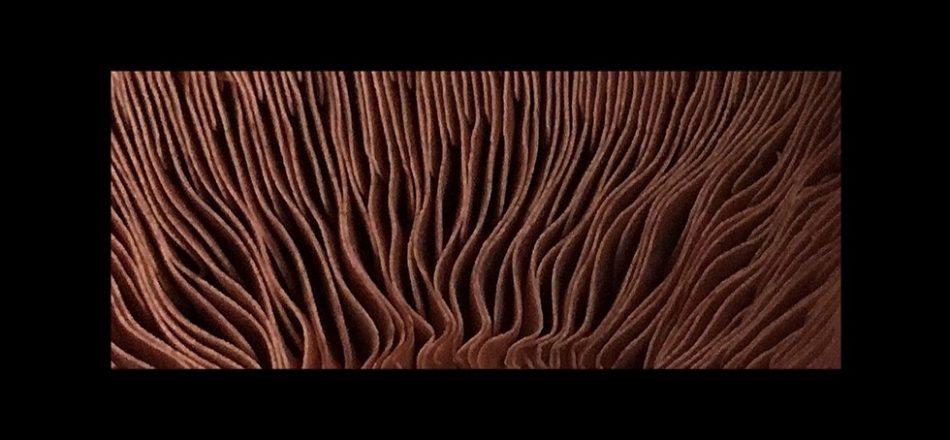
The mushroom lamellae, for example, are a thick specimen. The depth and contrast in the photo would be lost, if it were sliced thinly. As this sample is quite thick, transmission microscopy is not suitable for its imaging, as no light would pass through the specimen and reach the eyepiece. Instead, reflectance microscopy should be used to light the sample from above.
Generally, reflectance microscopy is a good choice if you are particularly interested in studying the surface of objects. Transmission microscopy, on the other hand, is particularly suitable for samples that are thinly sliced.
In the supporting material, you can find a list of sample suggestions to try out using different microscope setups.
The following activity requires the use of sharp objects (a razor blade or knife). Please remind students to be cautious when cutting and preparing the specimen. Alternatively, cutting can be done by the teacher in advance.
Note that, with such thin samples, they are usually translucent and do not have much colour and contrast to them. To better visualise structures, the use of staining might help.
The goal of this activity is to create a visual comparison of the micro and macro images. This activity asks students to think about their microscope image(s) and any overlap with the macro realm. Students, in groups, can be asked to present their photo comparisons to the rest of the class and explain how they ended up with this comparison.
This is also a good opportunity to allow students to think about structure–function relationships and find out the role(s) of the structure(s) they have observed under the microscope. This activity takes about 1 h.
Teachers may want to restrict search engines to results appropriate to the age range of students.
As an example of the kinds of comparisons that can be made, while visiting Brighton in the UK, I visited British Airways i360 tower. This reminded me of a microscope image I previously took during my bachelor’s studies of a geranium trichome at 100× magnification using transmission microscopy.
Trichomes are tiny hairs found on plants, algae, and lichens and have a variety of functions. The trichome seen in this image belongs to a geranium and is called a glandular trichome. Essential oils produced by the plant are stored in the spherical structure at the tip. When something touches the plant, the trichomes are damaged and release their essential oils.
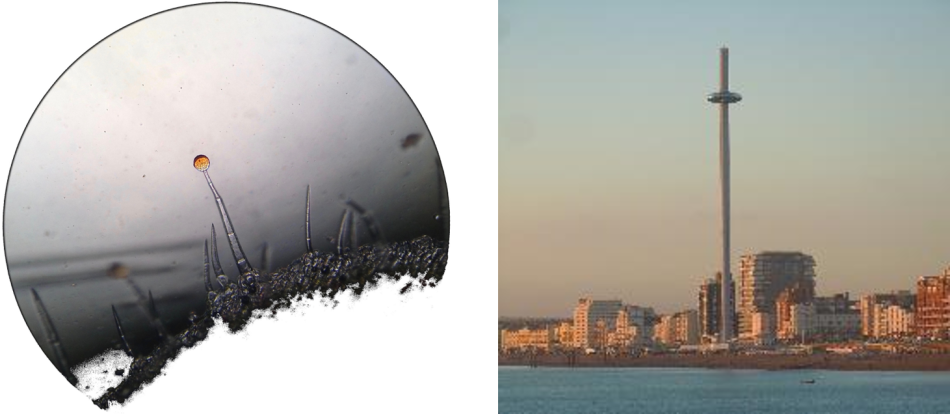
Link to functionality? Yes: in both cases, the thin stalk serves to elevate the globe at the top above the surface. For the i360 viewing tower, this is to give visitors a good view. For the trichomes, this is to ensure that physical contact with the plant breaks the tip and releases the essential oil.
This image was made with more sophisticated microscopy techniques than may be available in the classroom (staining and phase-contrast microscopy), but the supporting material gives some comparison examples that should be achievable by students, and further examples can be found in the Instagram photomicroscopy project it’s a small world.
This project is an opportunity for students to be creative and engage with the world around them. This is also a good opportunity to allow students to think about structure–function relationships. In the supporting material, there is an extension activity on ‘Photoediting to imitate art’, which can be used to allow students to learn more about artists and photoediting techniques, while using their works as inspiration to create micro–macro comparisons. This project can be run in cooperation with art or informatics teachers in an open-ended combined STEAM approach.
[1] A video by John Hindmarsh on how to use your mobile phone to photograph down the microscope: https://www.youtube.com/watch?v=ajXUzNeQcUc&t.
[2] Information about the ‘it’s a small world’ project: https://www.instagram.com/itsasmallworld.png/
Download this article as a PDF