Supporting materials
Download
Download this article as a PDF

Drop by drop: Learn about pH chemistry and neutralization reactions, and produce wonderful colours using microscale methods that are cheap, quick, and easy.
The visible display made by the various colours of indicators is a wonderful way of introducing chemistry to students. The concept will be used continually throughout their studies. Indicators are used in titration studies; in the medical field, such as pH variations in urine caused by kidney infections; in water-supply analysis; and in the environmental analysis of water in streams, rivers, and aquarium tanks, as well as establishing the pH of soil. These activities are suitable for students aged 11–16.
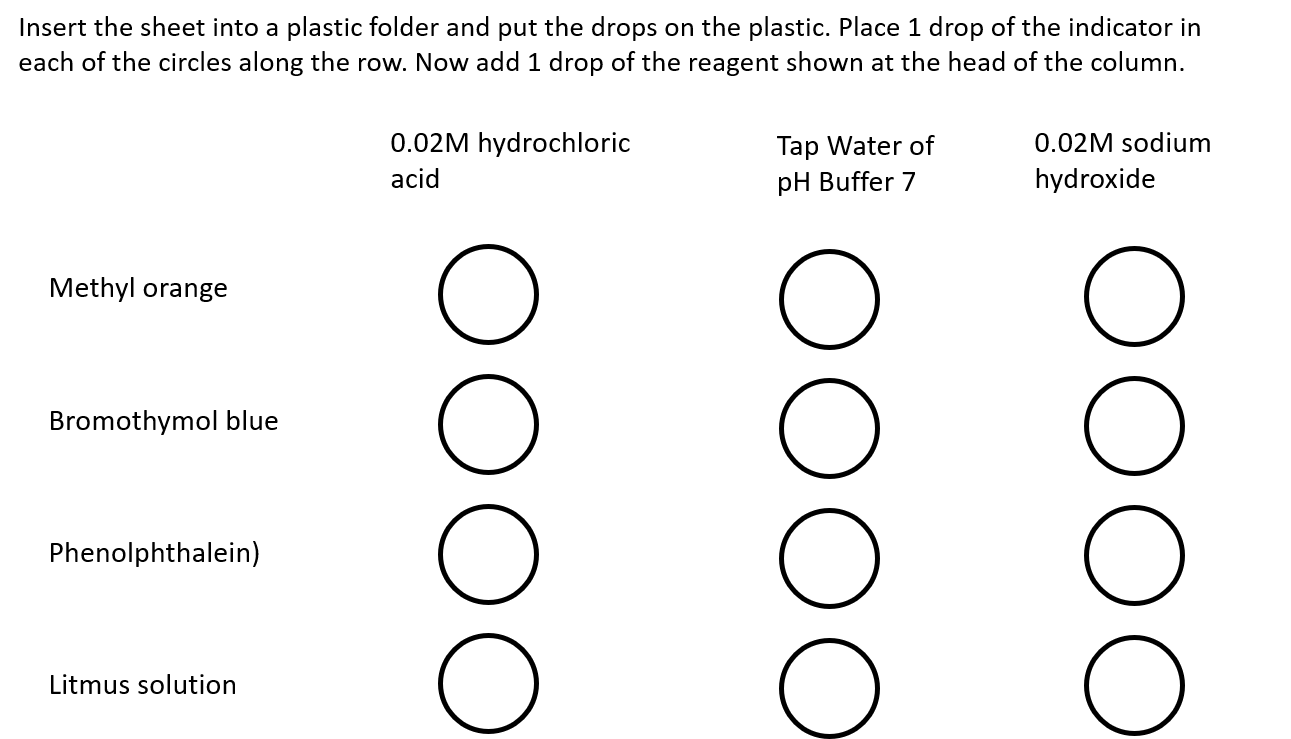
The microscale approach saves valuable time for student activities and in clearing up afterwards. Students are seated, which adds to laboratory management.
This activity uses a template similar to that on the right, which can be found in the Worksheet Templates file.
There is also a Practical Notes document that provides tips on equipment and making templates, along with instructions for preparing different buffer solutions.
The solutions used are of low hazard, but eye protection should be worn.
Litmus and bromothymol blue change colour at pH 7. However, students must realize that not all indicators change colour at pH 7, even though this is a ‘neutral’ solution, where the concentration of hydrogen and hydroxide ions are the same.
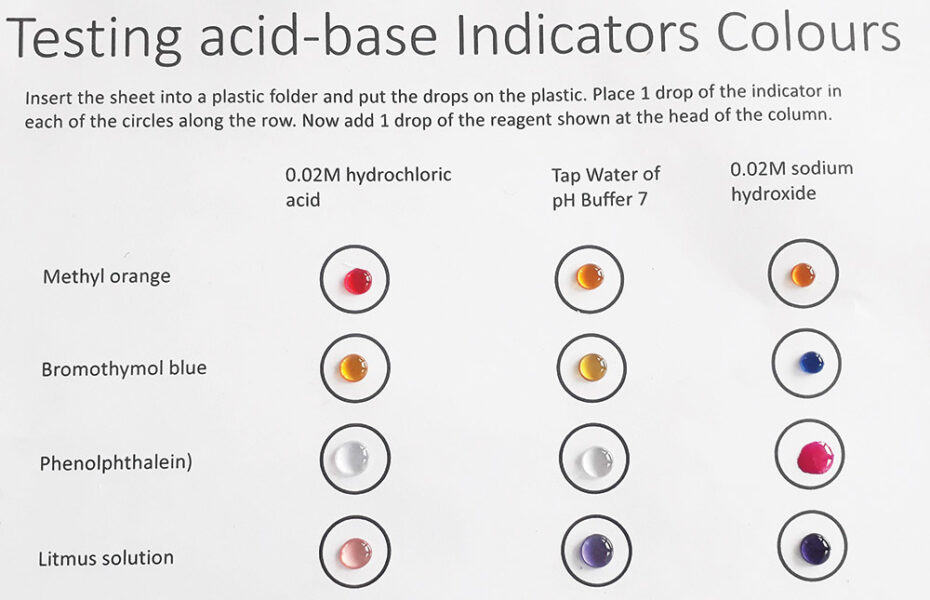
The method can be adjusted, depending on the chemicals available:
Many other synthetic indicators can be used as well, such as bromophenol blue or thymolphthalein.
Experiments can be repeated to focus on a different aspect of chemistry. Although colour changes are appealing to younger students, this change can also be used to explain the very difficult concept of reversible reactions.
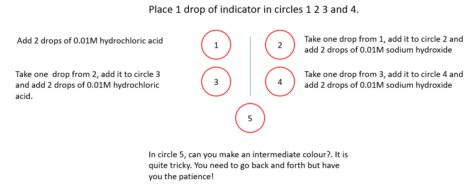
Indicators are weak acids, but the colour of the acid form (HIn(aq)) is different from that of the conjugate base (In−(aq)).
Here is a method of switching between the two coloured forms by repeated addition of acid and alkali.
This means that the change can be explained by the Le Chatelier principle. However, it is better to explain these effects using the equation that defines the equilibrium constant, a value that is constant at the same temperature:
If the concentration of hydrogen ions is increased, then for Kc to remain constant the value of [HIn]eq has to increase. If hydroxide ions are added, then the value of [H+]eq decreases, so the value of [In−]eq has to increase for Kc to remain constant.
The use of dilute dyes, and especially natural dyes, to illustrate reversible reactions is an example of ‘green’ chemistry. A reversible reaction often quoted in textbooks involving dichromate/chromate exchange occurs as a result of changes to acidity. However, chromium(VI) compounds are very hazardous to both humans and the environment, so a ‘green’ replacement is welcome.
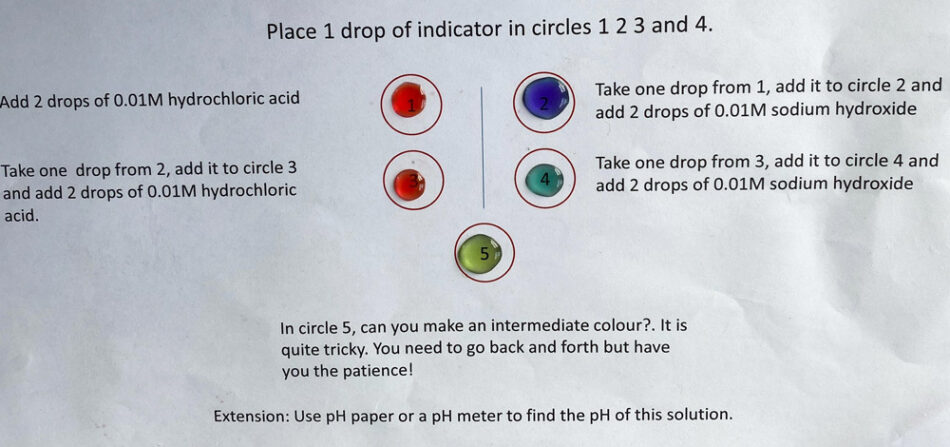
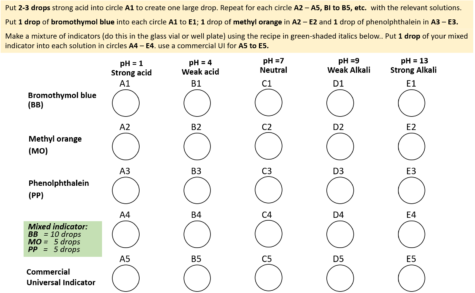
A synthetic indicator, such as methyl orange, changes colour very dramatically over a narrow pH range.
A universal indicator shows a smooth colour change over a wide range of pH values. This type of indicator is made by mixing different indicators, so that there is a range of colours over a wide pH range. The commercial mixture is based on methyl red with thymol blue, bromothymol blue, and phenolphthalein. Students can make a version with methyl orange using the template provided. The colours have an immediate impact on students and can lead onto an investigation into natural indicators.
This activity would use over 20 test tubes in a traditional setup, but here some students could even work alone. This activity has the instructions in full view under the experiment, reduces the load on short-term memory, and hopefully some information will be retained in long-term memory.
The solutions used are of low hazard, but eye protection should be worn.
Discuss the following questions with your students:
In the activity, students should see the following colour changes:
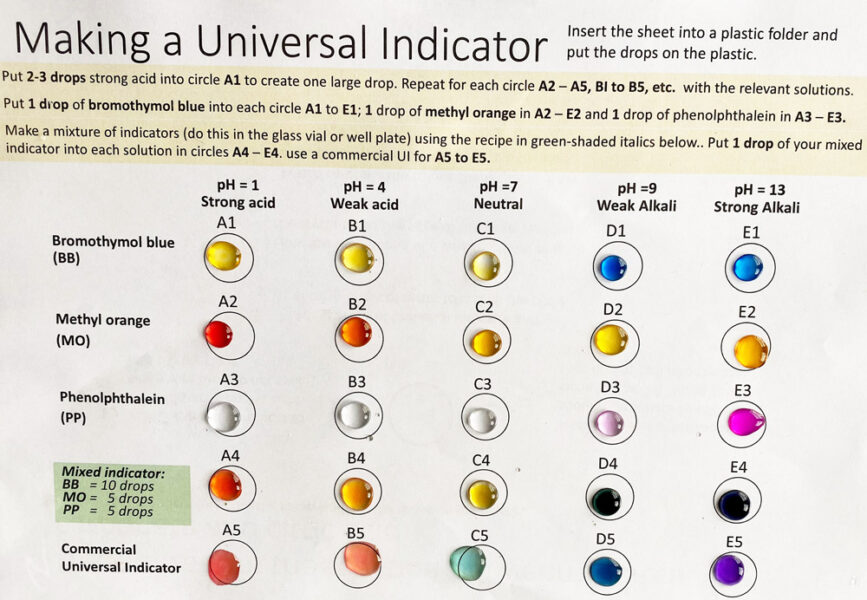
Bromothymol blue, methyl orange, and phenolphthalein change colour at one or sometimes two pH values and often give sharp colour changes, and thus, they are suitable for titration experiments.
These colour changes occur because indicators are molecules that can have different colours, depending on the pH of the solution. The pH range for the colour changes can vary for each indicator:
| Indicator | pH range for colour change |
|---|---|
| Bromothymol blue | 6.0–7.6 |
| Methyl orange | 3.2–4.4 |
| Phenolphthalein | 8.3–10.0 |
If indicators are mixed, then we can get a range of different colours at varying pH values. This is the principle of a universal indicator, which can be used to determine the pH of a substance.
As an extension activity, students can use indicators extracted from plants.
The is a really beautiful reaction, where an indicator is added to a circular puddle of water placed on plastic. Citric acid and sodium carbonate are introduced from each side. Immediately, different colours appear, but, as the colours meet, bubbles of carbon dioxide begin to appear.
The solutions used are of low hazard, but eye protection should be worn.
Discuss the following questions with your students:
During the activity, students should see the following colour changes:
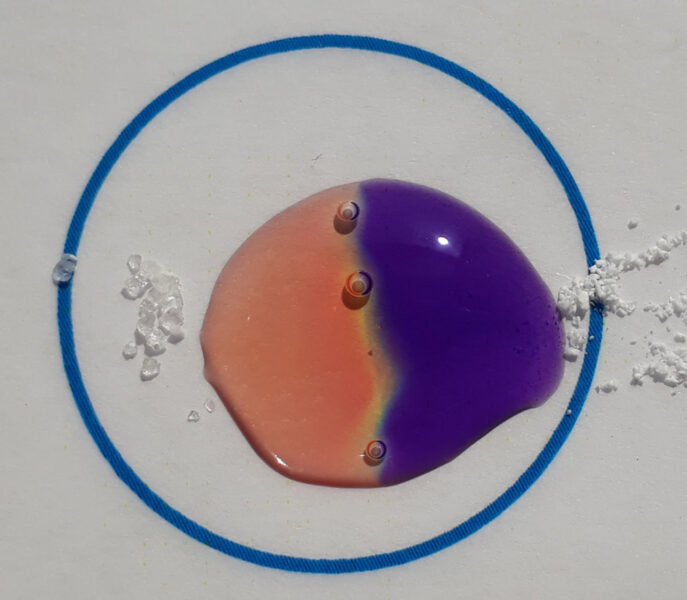
This is a neutralization reaction, in which citric acid reacts with a metal carbonate base – in this case, sodium carbonate. Water is required for the reaction to occur because it is needed to break up the ionic lattices of the reactants, as they are pushed in from the sides and begin to dissolve. This allows ions to diffuse towards each other and participate in a neutralization reaction. The products of this reaction are a salt (sodium citrate) plus water and carbon dioxide.
Point out to the students that the bubbles of carbon dioxide are appearing from the green/yellow neutral zone, where the neutralization reaction is occurring.
Many teachers are reluctant to try these methods. Just talking and writing about these techniques like a ‘sage on stage’ is all very well but getting down and trying them out is what really matters. Adrian and I have found that placing photographs from teachers and students on social media, such as Twitter and Facebook groups, provides a springboard for further interest.
Do you have a picture of this activity to share with us? Tag us on your favourite social media platform (Twitter, Facebook, or Instagram), and we will make a collection on our Facebook and Instagram pages.
The authors would like to acknowledge Beth Sutherland and Pixie Murray for their efforts in testing the procedures and taking images of their results, as well as Howard Tolliday for providing plants to test at Dornoch Academy, Scotland, UK.
Microscale and low-cost chemistry experiments are important to allow more students hands-on activity in class. The authors describe nice activities for acid-base experiments on “self-made spot plates” combining the student worksheet with a place of doing simple chemical investigations directly on them.
Ingo Eilks, Professor in chemistry education, University of Bremen, Germany
Download this article as a PDF