Supporting materials
Download
Download this article as a PDF


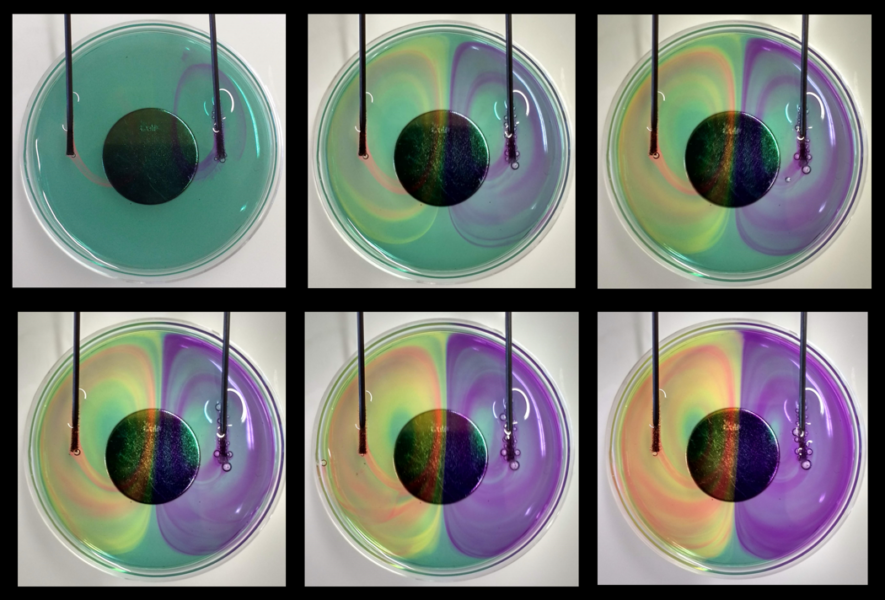
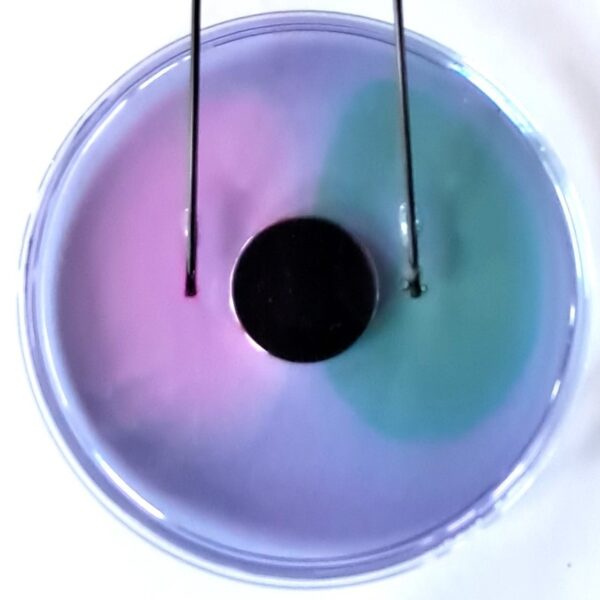
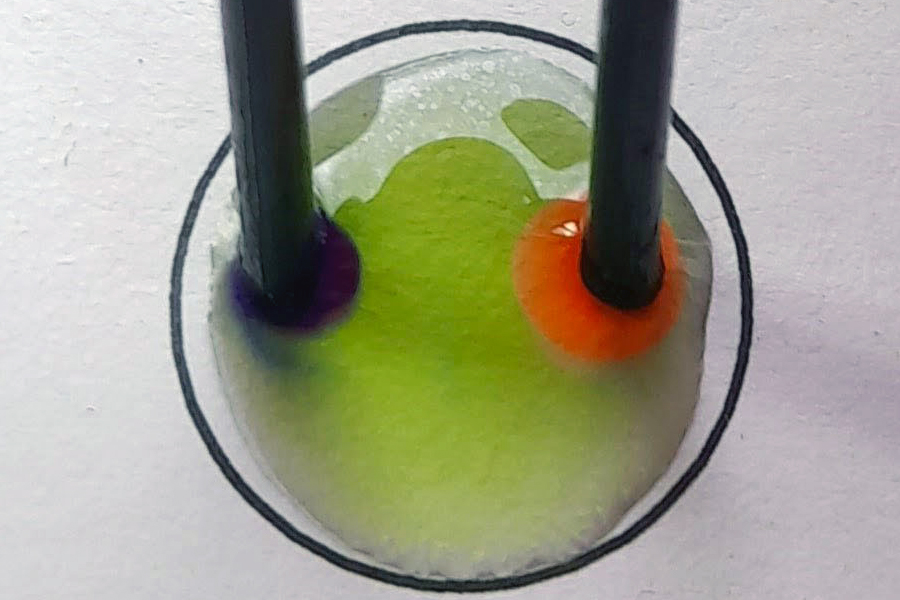
Chasing rainbows: the interaction of an electric current and magnetic field in a solution with pH indicator gives amazing colour patterns as electrolysis occurs.
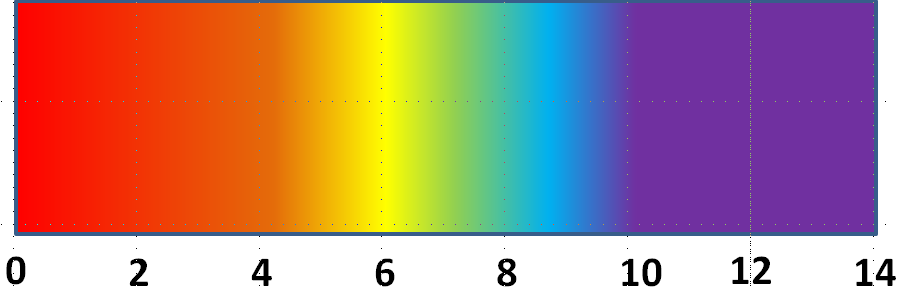
Water electrolysis requires an electric current to pass through water and, in addition to the formation of the elements hydrogen and oxygen, leads to acid–base chemical reactions. Electrolysis produces new ions, H+ (aq) and OH− (aq), which have an alkaline or acidic effect and change the colour of pH indicators.
The electric current is part of the electromagnetic phenomenon. It produces magnetic effects and, conversely, a magnet exerts forces on a conductor and can set it in motion.
Combining electrolysis, colour changes, an electric current, and a magnetic field creates dynamic colour effects,[1,2] which provide a particularly engaging way to demonstrate these topics.
The following activities are simple, safe, produce surprising effects, awaken the spirit of research, and allow students to conduct their own experiments, as the conditions (polarity of the magnets, position of the electrodes, stirring, etc.) can be easily varied.
The experiment demonstrates basic chemical and electromagnetic phenomena, is safe, and can be explained and deepened on different levels. It can be carried out by everyone and adequately discussed in terms of content; at school, it is most relevant for students aged 14–19. Due to the many references to topics in physics and general chemistry, such as material properties, acids/bases, and redox reactions, it is also suitable for first-year university students.
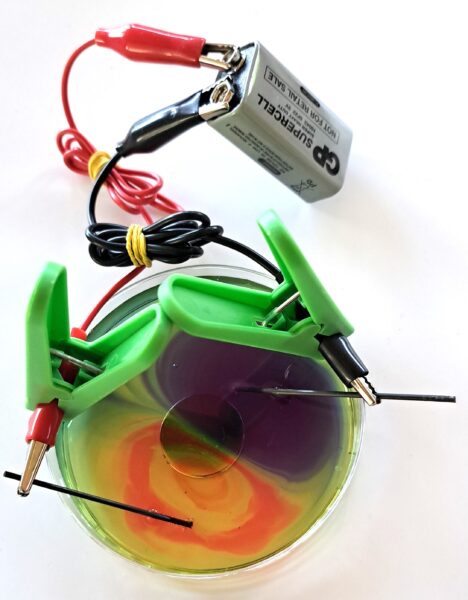
In this activity, electrolysis is carried out in a solution containing a pH indicator placed above a neodymium magnet. This leads to colourful swirls shaped by the magnetic field.
The experiment is fairly easy and safe and can be carried out by the students themselves. To save time and materials, the experiment can first be demonstrated by the teacher, and then, after discussing the results, the students can carry out their own experiments to test their hypotheses on the effect of changing variables. The time required is about 10 minutes to prepare the solutions, 10 minutes for each variant/hypothesis test, and 5 minutes for clearing up, with additional time for discussion.
There is a minor risk from a possible short circuit if electrically conductive parts touch each other without resistance. This is particularly possible with the electrodes or the crocodile clips. This could lead to overheating of the batteries or the power supply unit.
The neodymium magnets generate strong magnetic fields and forces that can cause injury if they snap together. This can lead to pinching of the skin if they are handled without spacing and caution.
The solutions present a low hazard and can be reused or poured down the sink in most places (please follow local regulations).
After discussing the results, the students should understand the electrolysis reaction that has taken place:
Positive electrode (anode):
Negative electrode (cathode):
Total reaction:
2H2O → O2 (g) + 4H+ (aq) + 4e−
2H2O + 2e− → H2 (g) + 2OH− (aq)
6H2O → 2H2 (g) + O2 (g) + 4H+ (aq) + 4OH− (aq)
(2×)
They should understand that the H+ and OH− ions make the solution acidic or alkaline at the respective electrodes, which causes the colour change in the indicator solution.
The ions Na+, SO42−, and NO3− are below or above water in the electrochemical series: they conduct the current required for electrolysis, but do not react.
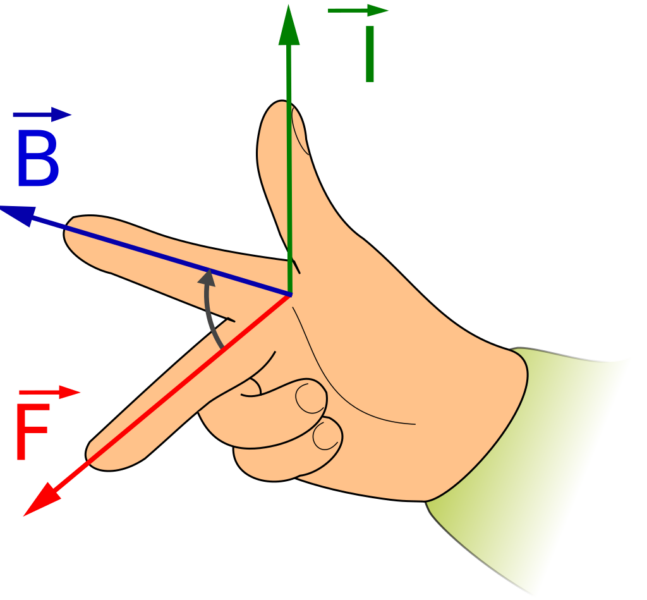
The movement can be explained by the Lorentz force F which is exerted by the magnetic field B on the electrolysis current I, whereby the orientation follows the right-hand rule.
These explanations are summarized in the colourful vortex infosheet, which can be handed out during the discussion. It may be helpful for the basic results to be discussed and understood before the students start to formulate their own hypotheses on the results of changing difference variables.
This experiment also lends itself to several optional variations, which can help engage students or help them understand different aspects of the phenomenon.
Use red-cabbage juice instead of a synthetic universal indicator.
It gives beautiful colours, and it can be more accessible and motivating to work with an indicator extracted from food. One disadvantage is that it turns yellow over time due to slow secondary reactions in the alkaline range.
Use ground powder instead of a pH indicator. The aqueous solution must be calm before a little pepper powder is sprinkled on the surface. It provides a visual demonstration of the process because in homogeneous solutions you cannot see the particles move, whereas the pepper particles visibly move, making the movement patterns directly observable.
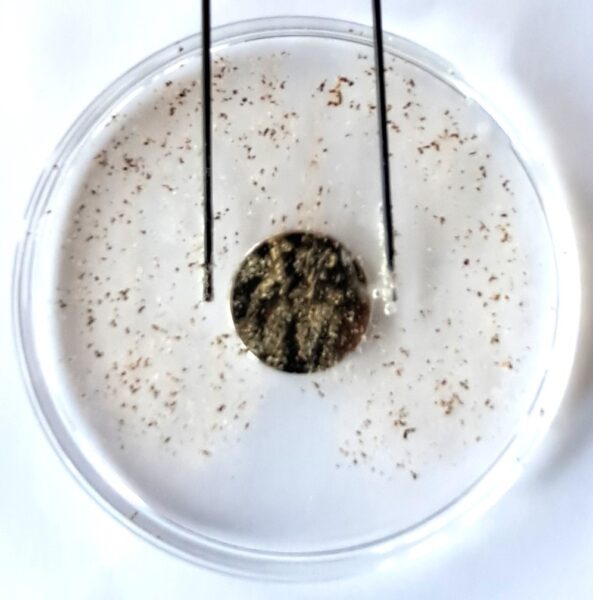
Table salt can be used as an everyday product instead of sulfate and nitrate salts in all variations. However, caution is needed since the electrolysis of table salt produces small amounts for chlorine gas. This is a cognitive extension of the basic experiment, because the chloride ions here are not inert and react to give a small amount of chlorine.
This electrolysis of sodium chloride produces small amounts of chlorine gas, so this reaction should be done in a fume hood or well-ventilated area in limited numbers/duration.
The combination of colour changes and movement leads to beautiful images and curious questions. What happens when I reverse the current or magnet? What happens if I change the pH, concentration, or viscosity of the solution? The hypotheses can easily be tested and confirmed or refuted, which leads to a strengthening of knowledge about electromagnetic phenomena and self-efficacy expectations for scientific work.
The experiment leads to a deeper understanding of electrical conductivity by electrons in the electrode and by ions in the aqueous solution of the electrolyte. Some ions are electrochemically inert and only contribute to conductivity (Na+, SO42−, NO3−); other ions are also involved in the electrolysis reactions (Cl−, OH−, H3O+).
The electromagnetic relationships observed and understood can be easily transferred to other technical and natural phenomena, which the teacher can explain or the students can research themselves. These include electric motors (especially homopolar motors); dynamos; electric generators; and the aurora [northern lights (aurora borealis) or southern lights (aurora australis)], which are easily associated with the experiment because of their movement and colours, as well as interesting similarities and differences. The magnetic deflection of the ion current can be used to explain mass spectrometry. In this analytical method, the masses of ions are determined in a vacuum through the degree of deflection.
[1] Watch a video on the electrolysis of sodium sulfate solution influenced by a magnet: https://www.youtube.com/watch?v=t2Thrs1axOw
[2] Koch K (2022) Elektrolyse-Wirbel im Magnetfeld. Chemietage Innsbruck (conference proceeding)
This article brings together two important topics in chemistry and physics (electrolysis and electromagnetism) and demonstrates these concepts in a colourful, visually pleasing way using a microscale approach. Chemistry teachers can also do these activities to teach the concept of mass spectrometry, which uses ions deflected by a magnetic field to identify unknown compounds and determine their molecular weights.
Ardian Allan, Dornoch Academy, Scotland
Download this article as a PDF
Stacking up: use common household items like coins and paper explore one of the most significant scientific discoveries of the 19th century.


Have you ever seen a blue cow? A blue apple? Or a blue tree? Blue is rare in nature, so why are some plants and animals…


Enhance your students’ knowledge of electrolysis using quick, safe, and easy microscale chemistry…
