Supporting materials
Table 1 - worksheet for students
Download
Download this article as a PDF


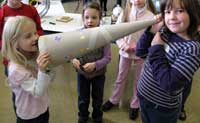
Werner and Gabriele Stetzenbach tell us how kindergarten and primary-school children discover the world of physics together with secondary-school students as their mentors. Why not try it in your school?
A number of projects have emerged in recent years to foster the curiosity of children in kindergarten and primary school. In 2001, we started one such initiativew1 in Winnweiler, which has since been extended throughout Germany with the help of several sponsors. Together with Werner’s secondary-school students from the Wilhelm Erb Gymnasiumw2 in Winnweiler, we developed physics teaching activities for children aged 4-10. With the secondary-school students as mentors, we went into kindergartens and primary schools and successfully ran experiments with the children on topics such as air, electricity, magnets, light, shadows, hearing, flotation and lightning.
A collection of teaching activities, experiences and background information has been published in a German-language brochure (THINK ING, 2007). Most of the experiments, as well as a general introduction to the project, are also available to be downloaded as English-language PDFs from the website of Science on Stage Germanyw3. Below are step-by-step instructions for a set of experiments on hearing, suitable for both kindergarten and primary-school children. The online PDFs also contain further experiments from this section.
The aim is for the pupils to understand the function and importance of the ear, so that they will turn their MP3 players down to prevent damage to their auditory systems. On a journey from a sound source to the inner ear, sound production and the anatomy of the ear are explained.
Get the pupils to take a walk through the grounds of the school or kindergarten, once with and once without earplugs, to experience the loss of environmental impressions when they partially ‘switch off’ their hearing. They will also learn about the dangers that (partially) deaf people are exposed to.
The human ear can perceive sounds with 20 to 20 000 oscillations per second. The number of oscillations per second is called the frequency. As we get older, we lose the ability to hear very high frequencies. Dogs can hear sounds with up to 35 000 oscillations per second (35 kHz), bats even higher-frequency sounds. Use a normal whistle and a dog whistle for the children to compare. Typically, a dog whistle is within the range of 16-22 kHz, with only the frequencies below 20 kHz audible to the human ear (and depending on the individual state of your hearing, you may not even hear these).
Adjust the volume of a signal generator with amplifier and loudspeaker to a medium level at an audible frequency. Then turn up the frequency to 50 kHz, and slowly tune it down from there. Ask the first child who can hear something to describe the sound (a high-pitched whistle).
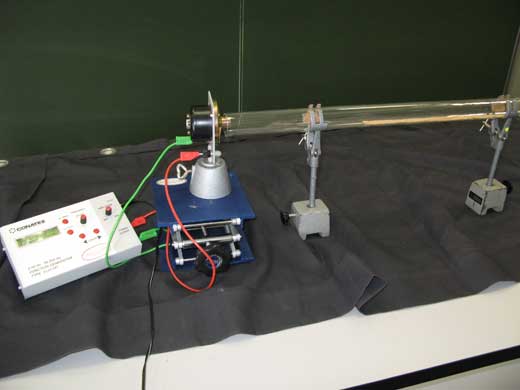
By testing our own hearing range, we can estimate the state of our hearing. Connect a signal generator with an oscilloscope and loudspeaker as indicated (see image).
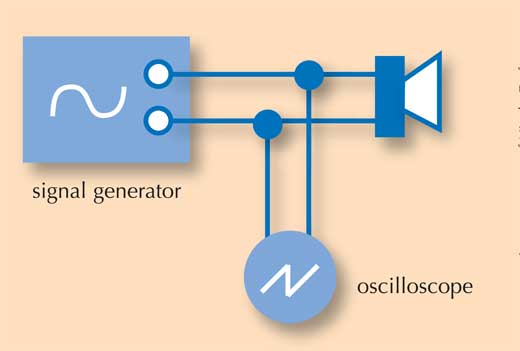
Using the signal generator, generate sounds between 250 and 16 000 Hz according to Table 1. To make the sounds comparable, make sure that they all generate a ‘wave line’ of equal ‘height’ on the oscilloscope.
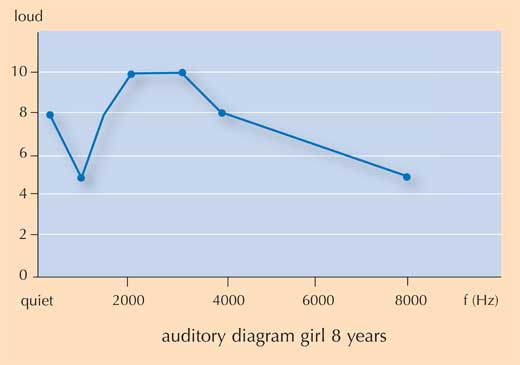
Ask each child to complete the table (which can also be downloaded as a worksheet from the Science in School websitew4), recording whether they experience each sound as being very loud, loud, medium loud, quiet or very quiet. This can be a little tricky.
To make it easier, start with 16 000 Hz and do pairwise comparisons between neighbouring frequencies to be measured, i.e. ‘How do you perceive the sound at 16 000 Hz? Now listen to the sound at 8000 Hz – how do you perceive it in comparison?’ And so on. Typically, the human ear is most sensitive to the frequencies at which we usually speak (about 200–3500 Hz).
With the help of a secondary-school mentor (or teacher), each child should plot the perceived volume (e.g. loud = 8) against the frequency of the sound.
| How do you perceive the sound? | Sound 1 | Sound 2 | Sound 3 | Sound 4 | Sound 5 | Sound 6 | Sound 7 |
|---|---|---|---|---|---|---|---|
| 16000 Hz | 8000 Hz | 4000 Hz | 2000 Hz | 1000 Hz | 500 Hz | 250 Hz | |
| Very loud (10) | |||||||
| Loud (8) | |||||||
| Medium loud (5) | |||||||
| Quiet (3) | |||||||
| Very quiet (1) |
It is useful to make the same measurements with adults (e.g. teachers or parents) as well, because as we age, we hear high-pitched sounds less well. You may notice this when the TV is on – young children may hear a high-pitched whistling noise whereas adults do not.
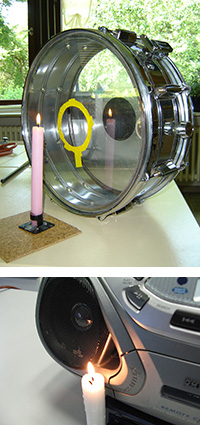
Because sounds are transported by variations in air pressure, sound moves air particles. The movement of a candle flame is used to illustrate this. Sound with a low frequency can even blow out a candle flame.
Use a plastic or paper model (which may be homemade) of the ear to illustrate the different parts of the ear, which will be explained in the following experiments.
The auricle collects sound like a funnel. Use a paper funnel as an ear trumpet to improve hearing: whisper into it and see how it magnifies the sound.

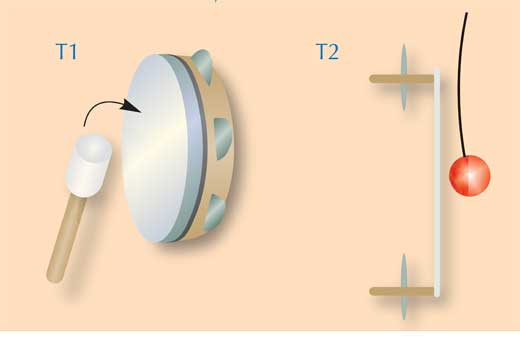
The outer ear acts like an organ pipe that is closed at one end, so that the air in it can vibrate. This vibration is passed on to the eardrum, a membrane that behaves like a drum, and then through mechanical linkage to the three ossicles (small bones).
Using the cables, connect the bass loudspeaker to the signal generator or CD player. Place some jelly babies on the speaker. Watch them ‘dancing’ with the vibrations of the loudspeaker membrane, which represents the eardrum.
There are auditory nerves in the hair cells of the cochlea. Sound (changes in air pressure) makes them move, which triggers information to be transmitted to the brain. The louder the sound, the more the hairs move. Very loud noises can even damage the hair cells.
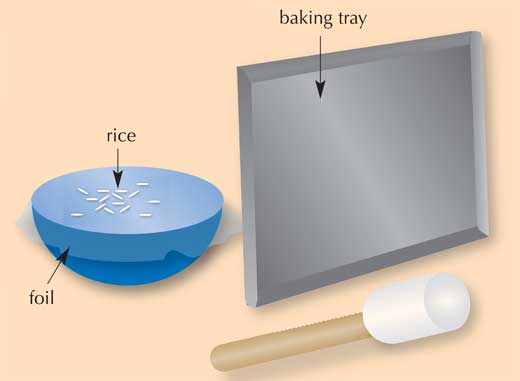
A glass tube is used as a model for an uncoiled cochlea. Cork dust or talcum powder inside the tube represents the hair cells.
Secondary-school students have a different perspective from teachers and educators, which can be very helpful when dealing with small children, as they can be easily accepted as ‘big brothers or sisters’. The secondary-school students involved in our project benefited a great deal from the experience: they learned to give presentations, became more self-confident and improved their organisational skills – all without the pressure of a standard classroom situation. Additionally, they got a first-hand insight into the work of teachers, educators, scientists and engineers.
A team should consist of 4-5 secondary-school students and a supervising teacher. In an initial brainstorming session, let the students come up with their own ideas; this will motivate them to be very creative. They may find it helpful to consult books and websites of teaching activities. By letting each student work on a separate topic, students of different abilities can be involved. The teacher should moderate the meetings, provide the experimental materials and help to set up the experiments.
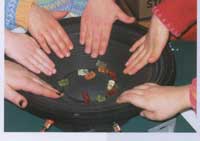
To inspire fun and curiosity, experiments should be easy to set up and, ideally, should involve several senses at once. When the younger children are able to experiment by themselves, they often express and test their own ideas.
It is important to contact potential project partners (kindergartens or primary schools) early on in the project. Whereas kindergartens tend to be open to many scientific subjects, the experiments for primary schools may need to fit the curriculum topics taught in science or nature lessons, if the subject exists.
Ask the secondary-school students to present their projects to each other, to get suggestions for improvements from the whole team. Remember to test the experiments with children of the target age beforehand, to estimate the required time. Up to seven younger children is a good group size. In our experience, each activity takes about 25-60 minutes, although we did not set a time limit.
The activities might take more time than expected, since children sometimes ask to repeat a section they particularly enjoyed. Keep in mind that young children enjoy being able to take small experiments home, or taking part in a small competition in which they can win prizes such as a jelly baby in an inflated balloon.
Especially when experimenting themselves, primary-school children had no trouble concentrating for up to two hours without a break. Before reorganising groups or starting a new experiment, hand out treats or drinks to mark the break.
And don’t forget, if this is a new experience for everyone involved, there may be reservations on both sides (the kindergarten or primary school, and the secondary-school team). However, if you discuss potential issues during the preparatory phase, this should be easily overcome.
This is an innovative and stimulating way of introducing science to young children. The experiments are simple, yet effective enough to explain how the ear works. At a time when the use of earphones is increasing, one could use the project to highlight how the ear can easily be damaged and what happens in such cases.
The article can be used by two separate audiences: the first are kindergarten and primary-school teachers. They can use the experiments detailed in this article and the additional activities developed by the project (available online) in their classroom. Some kindergarten and primary-school teachers may find it difficult because they do not have the necessary science background; this problem may be overcome through prior preparation, the help of a science specialist or the assistance of prepared secondary-school students, as in the presented project. Suggested background reading material can also be found in the ‘Resources’ section.
For secondary-school science teachers, the article provides details of how to set up a similar project with their students. If secondary-school students are involved, then such a project can be very motivating for them and should also help them to grow into more responsible adults.
The experiments are ideal to use for primary/kindergarten science, but may also be used in integrated/coordinated science. They are helpful for biology lessons to teach about the ear and hearing, and for physics lessons, to teach about the transmission of sound, the ear as a real-life application for the transmission of sound, or cleaning using ultrasound (jostling of dirt particles instead of the jelly babies).
Paul Xuereb, Malta
Table 1 - worksheet for students
Download this article as a PDF