Adventures in cyanoprinting: where art and chemistry meet Teach article
Author(s): Paula Egan
This activity was presented at the Science on Stage Festival 2024.
Try a project that blends chemistry, art, and peer learning, as secondary school students teach younger students how to create nature-inspired cyanotype prints.
Chemistry is often thought of as a subject that involves complex equations, reactions, and lab techniques. However, in this project, the artistic side of chemistry takes centre stage. By using a chemical process to create cyanotype prints, students can experience the wonder of science and art intertwined. The project involves secondary school chemistry students preparing cyanotype paper, which is then used by younger students to create beautiful art inspired by the natural world. Through this experience, students of different ages work together to discover both the magic of chemistry and the creativity inherent in scientific processes.
The central activity in this project is the creation of cyanotype prints – a photographic method developed by Sir John Herschel in 1842. By applying a simple chemical process to create photosensitive paper, students can capture intricate designs made from natural materials like leaves, rocks, and flowers. The project serves as a bridge between older chemistry students and younger students, allowing them to explore chemistry in an artistic context and fostering both responsibility and creativity.
The secondary school students prepare the cyanotype solution using the method outlined below. This will take approximately 15–20 minutes.
Safety notes
Iron(III) chloride hexahydrate and ammonium carbonate are irritants and toxic if swallowed or inhaled, but the final solution and developed pigment are low hazard.
Safety goggles should be worn.
Gloves should be worn to protect the skin, and a lab coat protects clothing.
Any spillages should be reported and cleaned immediately.
Ensure the room is well ventilated while using ammonium carbonate.
There is a small risk of hydrogen cyanide being released if potassium hexacyanoferrate comes into contact with a strong acid. Care should be taken to ensure no materials containing these are present in the lab at the same time. Technical staff should also ensure that no acids have been poured into the sinks by running the taps before the session.
Materials
A cyanotype print prepared earlier or a picture of one
Iron(III) chloride
Citric acid
Distilled water (100 ml)
Ammonium carbonate
Potassium hexacyanoferrate(III)
Beaker
Glass rod or magnetic stirrer
Spatulas (4)
Weighing boats
Mass balance
Plain white paper (preferably watercolour or thick art paper), bookmarks, tote bags, any type of cotton clothing
A covered box for storing light-sensitive paper
Water (for rinsing the prints)
Gloves (for handling chemicals)
Procedure
Producing the cyanotype solution
It’s most practical for the students to work in pairs.
They should add 3 g iron(III) chloride and 3 g citric acid to 100 ml distilled water in a beaker. This will require stirring to dissolve. A magnetic stirrer is recommended.
The students then add 4.5 g ammonium carbonate in small portions. At this point, the solution will change slowly from yellow to green with quite a lot of effervescence. When using ammonium carbonate, ensure the room is well ventilated.
Image courtesy of the author
5 g Potassium hexacyanoferrate(III) is added just before use. This is when the solution will become dark blue in colour. Once potassium hexacyanoferrate has been added, the solution then becomes photosensitive and light exposure should be kept to a minimum. If made ahead of the lesson, it should be kept in the dark.
Applying the cyanotype solution
Using gloves and a brush, the students carefully apply the prepared solution onto plain white paper or the item to be used (bookmark, fabric, etc.). This should be carried out away from windows or, if possible, in a light-limited lab or art room.
The paper should be evenly coated, but not excessively saturated. It is then left to dry in a dark, cool area to prevent light exposure until the design stage.
The teacher shows the students a cyanotype print and explains how it was made (place an object on the paper, put it in the sun until blue colour forms, then rinse).
The teacher can then discuss with the students the chemistry of what happens (see below).
Results and discussion
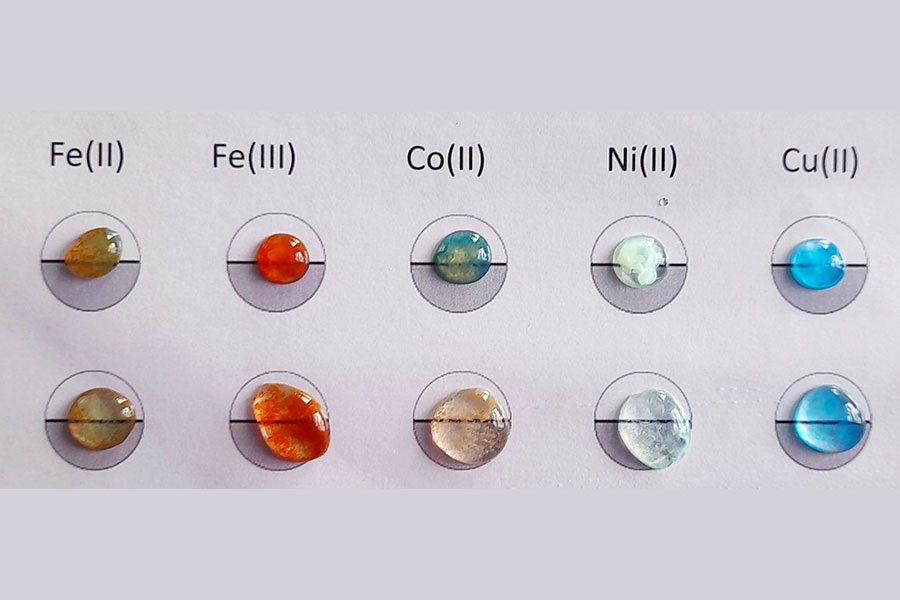
This can be used to discuss the chemicals used and the reactions that take place. This ties into topics like chemical reactions, redox reactions, as well as the properties of transition metals, the coloured compounds they form, and the role of ligands. While students learn a bit about transition metals in secondary school, this project goes beyond the standard curriculum for them.
The teacher can ask the students what they think is happening (a chemical reaction), which component they added is responsible for the colour (they may already know that transition-metal complexes are often coloured), and why the paper stops turning blue after rinsing (the reactants are water soluble, whereas the blue product isn’t).
Cyanotype printing relies on a chemical process in which iron(III) in a mixture containing ammonium iron(III) citrate and potassium ferricyanide undergoes a redox reaction under ultraviolet light to give blue-coloured iron(II) compounds. At the same time, citrate is oxidised to 3-oxopentanedioic acid:
2Fe3+ (aq) + C (OH)COOH(CH2COOH)2 (aq) → Fe2+ (aq) + CO(CH2COOH)2 (aq) + CO2 (g) + 2H+ (aq)
Using photosensitive paper to create art
Once the cyanotype paper has dried, the secondary school students take the lead in guiding primary school or younger secondary-school students through the next steps.
This section of the activity can take anywhere from 20 to 40 minutes, or more, depending on how the session is approached. Items can be preselected/provided for students to choose from, or they can explore the school grounds and select items they think might be interesting.
Image courtesy of the author
Safety notes
Younger students do not handle the original solution prepared by the older ones, so handling the dry paper is safe and requires no special safety precautions. However, everyone is advised to wash their hands before leaving the lab.
If the younger pupils do go outside and collect items from nature, then caution should be applied to the types of plant available. Stinging nettles and the like could be an additional hazard.
Materials
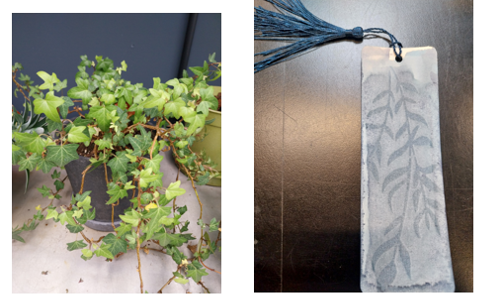
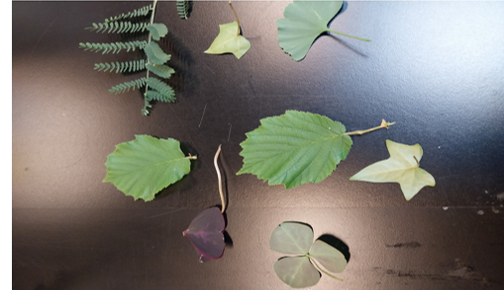
Natural materials (leaves, flowers, rocks, and other objects from nature)
Sunlight or a UV-light source
Optional: plastic or glass sheets (to weigh down objects during exposure)
Optional: paper or opaque acetate and scissors
Optional: different lamps, including a UV lamp or torch
Procedure
Older students, who made the paper, should be paired with youngers students, either individually or in groups.
The older students should explain to the youngers students that the paper contains a chemical that undergoes a chemical reaction under UV light and turns blue, and if the light is blocked in certain areas, it will leave white shapes.
The students should then gather natural materials together (like leaves, flowers, and rocks) from their surroundings, with the older students discussing the difference between opaque, translucent, and transparent materials, and how each item will impact the final design when placed on the paper.
Image courtesy of the author
Optional: discuss how this creates a negative image (white spaces where the objects were). What would you need to do to create a positive image, that is, the shapes you want in blue on a white background? Paper or opaque acetate and blunt-nosed scissors can be provided for students to create stencils for positive images.
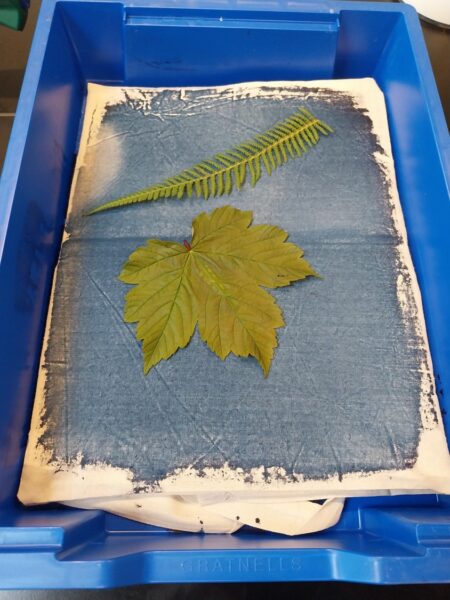
The students should then arrange the objects on the paper or cloth to make nice patterns. Ideally, this should be done under low-light conditions, for example, away from the window or with the blinds closed (but some of the classroom lights on).
Image courtesy of the author
The objects can be covered with plastic or glass sheets to stop them from moving around during exposure.
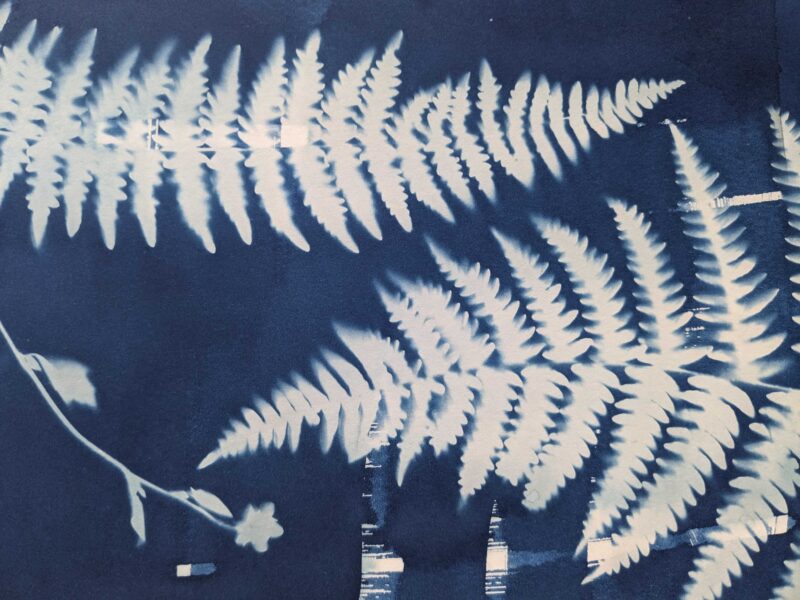
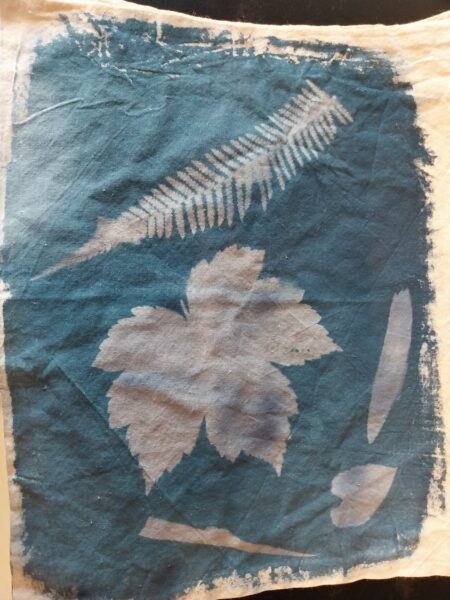
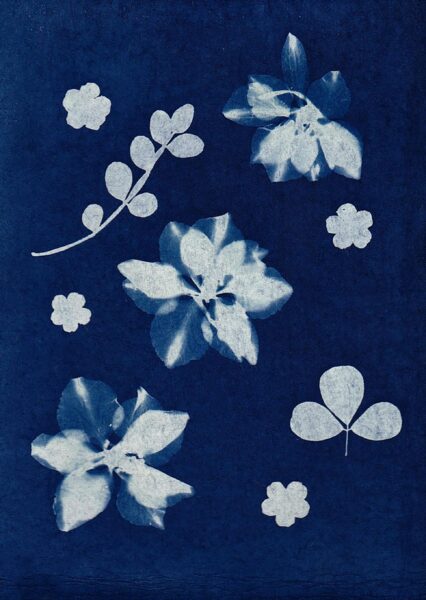
Once the natural materials are arranged on the cyanotype paper, the students carefully place the paper in sunlight until a blue colour forms (time varies, depending on the light intensity, but it should take around 15 minutes).
Light exposure causes the chemicals on the paper to undergo a reaction, producing blue compounds. The areas covered by the objects remain white, forming a negative image.
After exposure, the students remove the natural materials and rinse the paper or cloth with water to stop the chemical reaction and reveal the final design. After drying, the students can take the prints home.
Image courtesy of the author
Optional extension for older students
Encourage students to refine their methods, aiming to increase the contrast in their images. They can explore different approaches to achieve this, such as using UV light (torches) instead of creating the images by a window, applying weights to hold down the items found or stencils they have made, and experimenting with varying the development time. If this is done before the lesson with younger students, they can use what they’ve learned to help the younger students get the best images.
Another possible extension is to investigate what wavelength of light is required for the reaction. Encourage them to come up with questions/hypotheses and test them. Does it work if you shine a lamp on the paper instead of using sunlight? What if we use a filter? Is there a lamp we can use indoors that works well (answer: UV lamps)?
Safety notes
If using UV lamps or torches, ensure that students can’t look into the lights or point them at each other’s eyes.
Results and discussion
The objects placed on the paper act as a mask, blocking some of the light and creating a blue-and-white negative image. The process is similar to early photographic techniques and is a great introduction to both the art of photography and the chemistry involved in light-sensitive materials. The history of the pigment Prussian blue in science, art, and society is also an interesting story.
Links to women in science
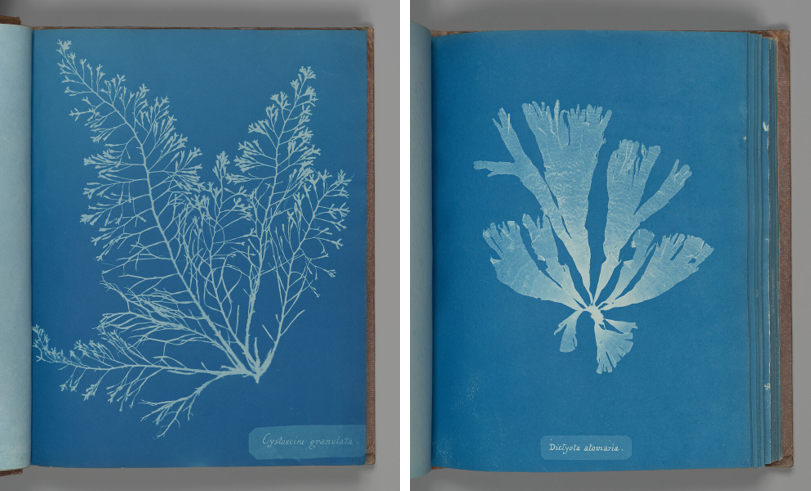
Anna Atkins, a pioneer in photography, is best known for using the cyanotype process to capture images of plants. In the 1840s, she created detailed, vivid blue prints by placing botanical specimens directly onto photosensitive paper and exposing it to sunlight. Her work, including the groundbreaking book Photographs of British Algae: Cyanotype Impressions, is considered the first published book illustrated with photographic images. As one of the first women to make significant contributions to both science and photography, Atkins stands out as an early figure in the history of women in STEM, breaking barriers in a field dominated by men.
This method offers a unique opportunity to combine chemistry, art, and nature. Older students learn how to handle chemicals and create cyanotype paper, while younger students have the chance to explore nature and art through a hands-on activity. The excitement of watching the print develop as they remove the leaves or other objects from the paper adds an element of wonder to the learning process. Both groups of students benefit from the experience, as the younger students develop an appreciation for chemistry and creativity, and the older students hone their ability to explain complex scientific concepts in an engaging way.
In a world where the boundaries between subjects like chemistry, art, and nature often seem rigid, this project highlights how they can come together in unexpected and magical ways. It shows that science isn’t just about equations and formulas; it’s also about the creativity and curiosity that drive exploration.
One student shared, “My GCSE project title is ‘Colour and Texture,’ and I’m planning to include this print in my refined section. I took the photo of the jellyfish and made an acetate negative using Photoshop, then used that as my negative to create the print. As a subtopic of my project, I’m really interested in the importance of the artistic process, so mixing my own cyanotype solution was a great way to engage with this aspect of my coursework.”
This comment perfectly captures the value of combining chemistry and art, showing that chemistry can inspire creativity while deepening students’ understanding of both subjects.
Acknowledgements
We would like the thank Dr A. Reesink & Ms C. Wells, without whom the project would never have happened, as well as Ms V. Duelas for her boundless patience.
Explore how different wavelengths of light can reveal hidden information in paintings: Giannakoudaki K, Chatzisavvas G (2025) Shedding light on a Picasso. Science in School72.