Supporting materials
Procedure to perform the shoebox experiment (Word document)
Procedure to perform the shoebox experiment (PDF file)
Download
Download this article as a PDF


More than 10 years ago, a very clever and inventive inhabitant from a favela discovered he could produce light without electricity. Now solar bulbs are spreading all over the world.
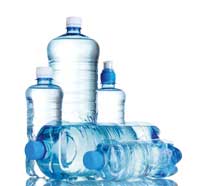
Back in 2002, Brazilian mechanic Alfredo Moser came up with a way of illuminating his house during the day without electricity. Instead, Moser’s solution just used a plastic bottle full of water. The innovation, which uses the phenomenon of refraction, has now spread throughout the world and it is expected to light over 1 million homes this year.
Many teachers are afraid of introducing physical topics in primary schools but while students might not be able to call it light refraction, many will have seen how a straw seems to bend as it goes from air into water. This article aims at providing a theoretical background to light refraction and shows how the solar bulb can be used in the classroom to demonstrate the phenomenon
Thinking back to the straw in a glass of water, the straw seems to be bent or broken. This happens because water is optically denser than air and so light travels slower in water than air. The change in speed bends the light as it passes from one substance to the other, a phenomenon called refraction. In refraction, two different things are important, the angle that the light hits the interface between the two materials, called the angle of incidence, and a specific property of each of the two materials involved, the refractive index. Generally speaking, denser materials have higher indices of refraction because denser materials slow light down more.
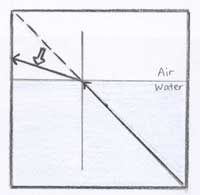
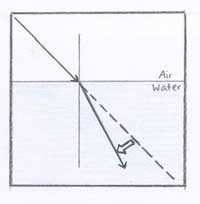
Think of how a car travels quickly on road but slows down when driving onto a muddy field. Refraction does not occur when light rays strike the interface between two transparent media at a right angle, much like driving onto a muddy field straight on will slow you down but you will still be driving in the same direction. However, if you come at the field at an angle, the wheels that hit the mud first will be slowed down and the car will turn. In a similar manner, if light rays strike the surface at an angle the light rays will change direction. The direction of that depends on the refractive indices of the two media involved (figures 1 and 2).
The phenomenon of light refraction can easily be shown in the classroom with some introductory experiments.
In physics, Snell’s law is used to describe refraction and its properties. Snell’s law states that the velocity of the incident light divided by the sine of the angle of incidence is equal to the velocity of the refracted light divided by the sine of the angle of the refracted light, (v1/(sinθ1)) = (v2/sinθ2 ). This means that when light passes from a substance of lower optical density to a substance of higher optical density, slowing it down, the light ray is bent towards the normal of the boundary between the two media. This is what happens when a light beam in the air enters water. In the opposite case, when a light ray enters a medium of a lower index, for example going from water to air, it will bend away from the normal.
Snell’s law can also be written in terms of the refractive index, or how optically dense the medium is. A medium’s refractive index, n, is defined as the ratio of the speed of light in a vacuum, c, to the speed of light v in the medium, n=c/v. That also means that Snell’s law can be written as sinθ1 n1 = sinθ2 n2.
As the speed of light in a vacuum is always 3 x 10⁸ ms-1, it is easy to calculate the index of refraction for a medium as long as you know the speed of light in that particular medium. Practically speaking, denser materials have higher indices of refraction as denser materials slow light down more.
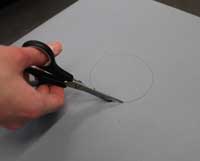
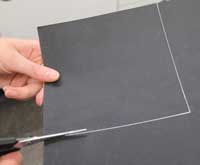
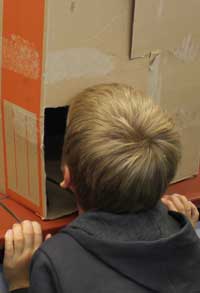
Just as we have done, the topic of light refraction can be introduced by discussing how a straw or pencil in a glass appears broken when viewed from the side, which is a good basis for evolving questions regarding this topic. The theoretical laws of refraction can then be demonstrated by building a simple experiment with a shoebox. The experiment should be done in groups of two or three as it is a bit tricky. Depending on the students’ age and on how much time the lesson offers, the teacher could also prepare the shoeboxes beforehand in order to shorten the time dedicated to handicraft work in class.
As explained in the detailed documentw1 you can download from the reference section, you will need a torch, a shoebox, a craft knife, and a glass of water. Carefully cut two vertical slits into the short end of the shoebox. The space between the slits should not be wider than the glass. When the torch is shined through the two slits you should see two straight lines of light. Now, place the glass of water in the box so that the two strips of light hit the glass. When the glass of water is placed behind the slits, however, they cross each other. This is the result of the light being slowed down by the water, as it has a higher optical density than air. According to the law of refraction, the light is bent inwards and so the two light rays eventually cross.
Having demonstrated refraction, you can show how the solar bulb exploits it to light rooms and houses with about as much light as a 50–60 Watt incandescent bulb. With just a plastic bottle full of water people can light up their rooms and huts. Moser’s original concept has been further developed by charities to bring sustainable and affordable lighting to communities in Africa, the Philippines, India, and other south-east Asian countries without the use of electricityw2. In the classroom, it should only take about 10 minutes to create your own version.

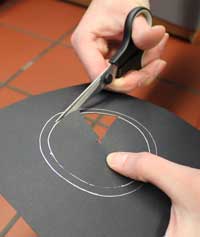
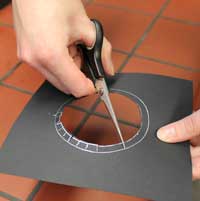
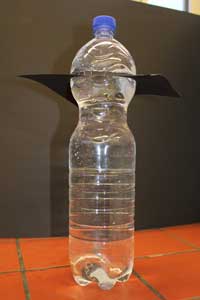
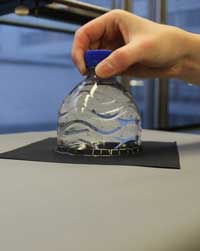
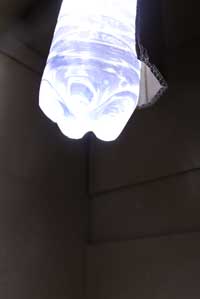
The solar bottle bulb relies on the refraction principle. Because the light from the torch passes from a lower-index medium (air) to a higher-index medium (water) the light rays bend inside the water, then when the light comes out it is spread out around the room. For this to happen the bottleneck has to be stuck out of the roof, while the spreading of bent light rays is performed by the main part of the bottle which is hanging from the ceiling (Figure 3), like a proper light bulb. The great advantage of this light supply is its sustainability and safety. There are no risks of fire hazards with this type of “lamp” and they are inexpensive to make and fit. In practice, chlorine is added to the water to keep the water clear and free of algae and microbes, and the bulbs are sealed into the roofs to make a weather proof seal.w3 There are plenty of videos on the internet to show how it is done using proper house building materials.w4
Depending on the students’ age, the solar bulb experiment could be part of a larger interdisciplinary project on problems for developing countries compared to the student’s own experiences. After seeing the bulb in action, the students should realise how big an advancement the solar bottle bulb is for people without a secure source of electricity. In order to compare our electric equipment with this means of light production, the students can measure the different light levels. The social situation of affected people could also become the focus of attention and could be used as a starting point for a school project to raise money to help spread solar bottle bulbs to underprivileged regions.
The solar bulb is an innovative solution to the problem of lighting houses and provides a simple demonstration of physics which will help motivate students to engage with the topic. It also provides an excellent opportunity for interdisciplinary work. Throughout the experiments, the children practice teamwork and the allocation of responsibilities, thus enhancing their social skills. Apart from the content focus, the lesson’s emphasis could also be placed on the scientific method by introducing test protocols, which will be beneficial for future work in other natural science-subjects. The approach of including the solar bottle bulb into teaching has already been implemented in many schools as part of projects on light or alternative energy, so your pupils should be given the chance to experience light refraction from a practical point of view as well.
The article focuses on the important topic of refraction. Children may be aware that a straw appears to bend when it enters a glass of water but it is difficult for them to imagine that it is the light that is actually bending and not the straw. The shoe box experiment should very useful to help them visualize the bending of light rays.
The idea of a solar bulb should intrigue young children. It may be used as the basis for a discussion on its possible every day applications. In which rooms or areas at home may such bulbs be used? Students may be engaged to discuss both the advantages and disadvantages of using such a system at home. One can discuss the use of the solar bulb in the context of developing green buildings, reducing our dependence on electricity as well its economic value.
Teachers can very easily adapt the concept to a school project, in which students investigate the feasibility and value of introducing such a system at home or in the wider community. Although the article is mainly aimed for primary teachers, both science and physics teachers in secondary schools should find it useful when introducing the concept of refraction.
Paul Xuereb, Malta