Supporting materials
Worksheet for Activity 1 (Word)
Worksheet for Activity 1 (Pdf)
Worksheet for Activity 2 (Word)
Worksheet for Activity 2 (Pdf)
Download
Download this article as a PDF


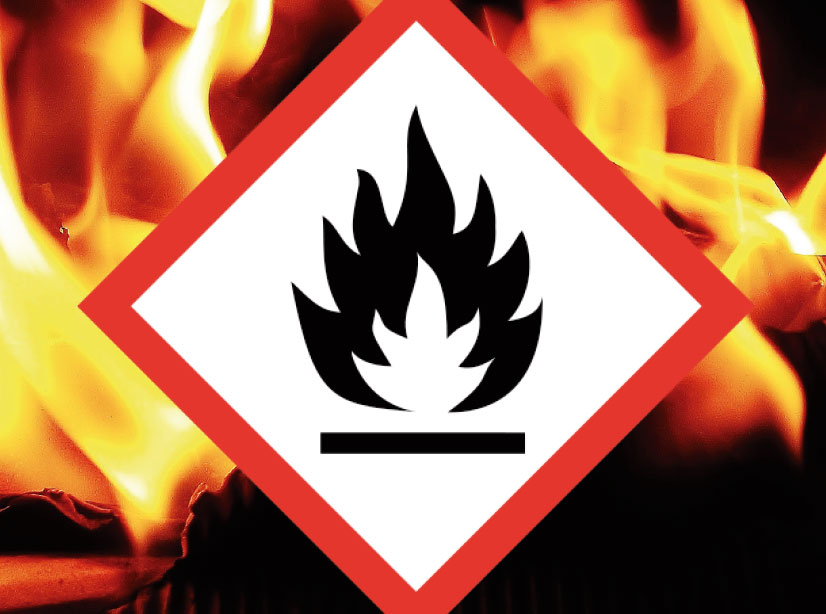
Hot, luminous and destructive: fire is a force of nature. Here we look at how to use and control it safely with water and carbon dioxide.
Fire has a place in prehistory, culture, and technology. Early humans would have encountered fires of natural origin – from forest fires and lightning to perhaps volcanic eruptions. Later, humans learned how to create and sustain fire at will and to use it for light and heat. Much later, we came to understand its chemistry and how to adapt it for use in the most exquisitely controlled way – as in, for example, the internal combustion engine.
Today, as well as being an essential part of technology, fire is a hazard: in Europe, several thousand people lose their lives each year due to fire, with economic losses estimated at one per cent of GDPw1. Fire is thus an important topic, for both its power and its risks.
Inspired by this idea, we have developed a set of activities for students aged 11–14 to safely explore the nature of fire. In the first activity, we show how to ‘burn money’, while the second activity demonstrates the fire-extinguishing properties of carbon dioxide. Finally, we give students a chance to discuss how to stay safe from fire. The activities require a total of around 35 minutes (the first activity about 15 minutes, and the second and third are 10 minutes each).
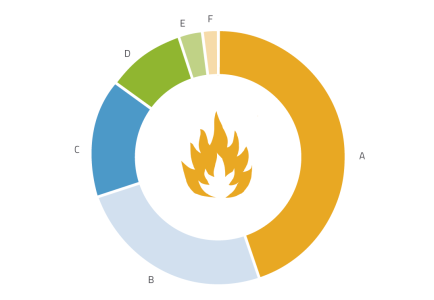
As a prelude to the practical activities, we asked the students to name five ideas they associate with the word ‘fire’. The most frequent associations are presented in figure 1.
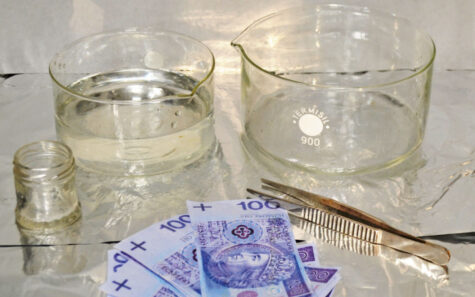
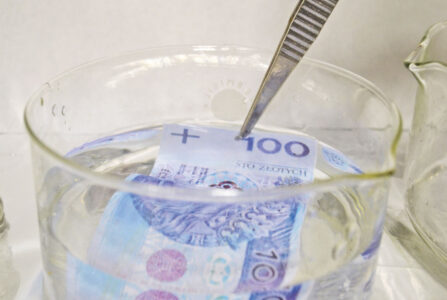
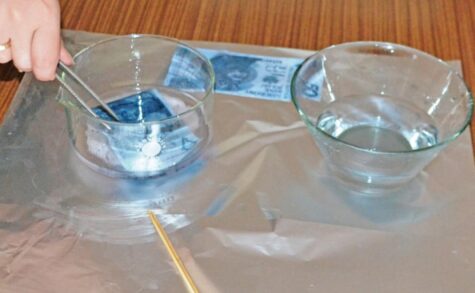
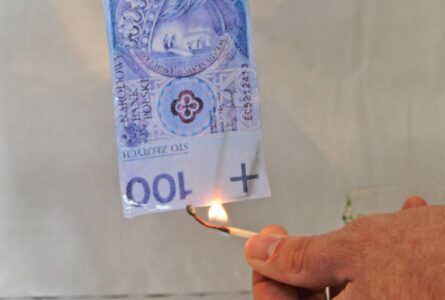
This activity is a bit like a magic trick – a demonstration of how you can burn your money and still keep it!
This activity should be carried out by the teacher as a demonstration.
Safety glasses, a lab coat and gloves should be worn. Special care should be taken with the open flames and when handling the methylated spirits to avoid causing a fire.
After the experiment, ask the students to discuss among themselves in groups what happened. Encourage them to come up with their own ideas, using a worksheetw2 or the following questions:
Then discuss the students’ ideas as a class, guiding them if needed to the correct explanations.
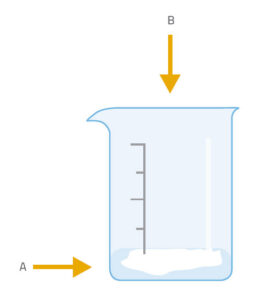
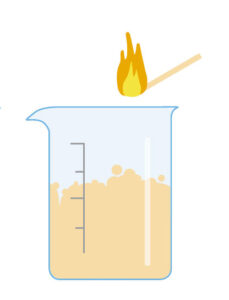
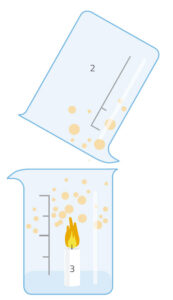
This activity is carried out by the students under teacher supervision. There are two variations: in the simpler one (version 1), we produce carbon dioxide in a beaker and then find that it will extinguish a lighted match or candle placed in the beaker. In version 2, we tip the carbon dioxide over the flame – an action similar to that of using a fire extinguisher to put out a fire.
Safety glasses, a lab coat and gloves should be worn, and the activity should be carried out in a well-ventilated area. Special care should be taken with the open flames and when handling the methylated spirits to avoid causing a fire. Students should be reminded how to work safety with flames, and what to do with the hot remains after the experiment.

Ask the students to discuss among themselves in groups what happened (in either version of the experiment). Prompt them with questions such as:
Use a worksheetw2 to provide a structured approach to these questions, guiding students to the correct explanation.
The gas produced in the reaction of baking soda with vinegar is carbon dioxide (CO2):
NaHCO3 + CH3COOH → CH3COONa + H2O + CO2
Carbon dioxide is heavier than air, so it stays in the beaker. It also does not support combustion – in fact, it prevents oxygen from reaching the flame, which is needed to sustain burning, so the flame goes out. The fact that carbon dioxide is heavier than air also means it can be ‘poured’ from beaker to beaker.
Carbon dioxide can also be dangerous for humans and other animals, when it occurs in higher concentrations or in an enclosed space (which is why it is necessary to carry out this experiment in a well-ventilated area). This is not simply because we need oxygen to breathe, but also because our bodies sense carbon dioxide levels and use this to regulate breathing – so an atmosphere containing just one per cent carbon dioxide can interfere with this mechanism. But carbon dioxide is also useful: plants use carbon dioxide, water and light for photosynthesis, which produces oxygen and enables plants to grow.
The aim of this final activity is to raise students’ awareness of the risks associated with fire. Topics to cover include:
We suggest starting with an initial teacher-led discussion, followed by students carrying out Internet research in groups. Each group can tackle one of the questions above (or similar questions), creating a poster or a presentation to show the rest of the class.
It is also worth considering inviting a guest speaker – ideally a fire-fighter or a first-aid provider trained in dealing with burns. As well as providing information, this will underline the fact that fires really do happen – and while we rely on trained experts when things go wrong, it’s up to all of us to help prevent fires from happening in the first place.
This article is a great opportunity for teachers to connect lessons with the children’s everyday experiences. It combines exciting activities with a final discussion about safety; I like the fact that the article is based on learning about fire safely. Furthermore, the final activity makes the article suitable for discussions relating to the limits and dangers of chemistry and science, and their application in real life.
Christiana Nicolaou, Archangelos Elementary School, Nicosia, Cyprus